The vast majority of trees I see planted in the medians of our roadways, in our shopping centers, and in our front yards are planted incorrectly. These trees will never reach their full potential and many will fail to survive. Shortcutting the planting process is unwise. Following proper planting technique will reward you with a beautiful, healthy tree that will be a valuable addition to your landscape and to our local urban forest.
To select the right species for planting in the right location, consider the following:

Improper Species Selection
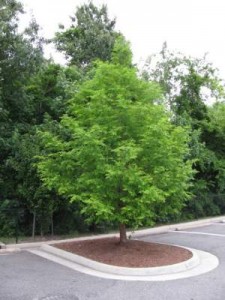
Baldcypress Will Outgrow Site
- Tree form and mature size
- Site conditions, i.e. soil type, drainage, sunlight exposure
- Cold-hardiness
- Pest and disease resistance
- Aesthetics
A high quality tree should be purchased and transported carefully, without exposure to high winds or trunk damage. Nurseries typically grow containerized trees in a substrate that is well-drained. This requires frequent and regular irrigation. Therefore it’s best not to plant a containerized tree during the hottest days of summer unless you are prepared to irrigate daily. If a high quality tree is selected and transported correctly, there should be no diseased or broken branches that need pruning. The roots should not be matted and circling the walls of the container. This is a frequent problem and can easily lead to girdling roots and tree death a few years after planting, especially in maples.
Proper Planting Technique in 8 Easy Steps
1. Dig a Wide, Shallow Planting Hole – If the landscape setting allows, take the time to dig a hole that is three times the diameter of the container. Most of our urban soils are heavily compacted and digging a wide hole and backfilling correctly will improve soil structure and allow new root growth to expand more easily. Do not dig the hole deeper than the container. The bottom of the root ball should rest on undisturbed soil and the root collar or root flare should be planted slightly above grade. Don’t be tempted to dig a smaller diameter hole to save time and effort. A wide planting hole is critical for your tree’s success.
2. Do Not Fill the Bottom of the Hole With Gravel – Soil and water properties can and will cause a perched water table that will effectively drown and suffocate a tree’s root system.
3. Remove Root Ball – Carefully slide the root ball from the container by tapping lightly on the container sides or by cutting the container. Do not pull the tree out of the container by grabbing the trunk. Use your hands to loosen the roots on the outside of the root ball.
4. Keep Root Flare High – Place the root ball in the hole with the root flare slightly above grade. The roots need oxygen to respire and will grow best near the surface and in soils with good soil structure. Planting too deeply is a common problem.
5. Backfill – While holding the tree vertical, backfill with the same soil that was removed from the hole. As you backfill, tamp the soil lightly but not vigorously. If you tamp too hard, you will compact the soil and make conditions more difficult for root growth.
6. Prevent Girdling – Remove any tags, twine, strings, or wires from the tree. Any ties left on the tree can easily girdle the stem and cause tree death or long term structural defects.

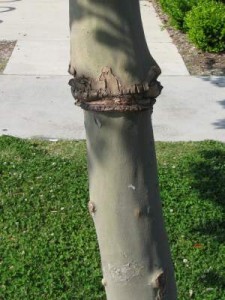
Severe Girdling Damage
Caused By Improper Staking
7. Provide Support – Stake the tree only if absolutely necessary. Most container trees do not need staking. Giving the tree unnecessary artificial support will change its growth. A tree needs to sway in the wind to develop good taper. When your leg is placed in a cast the muscles will atrophy. The analogy is not perfect but staking has a similar effect on tree growth. If the tree is staked, staking material should be removed as soon as practical.
8. Irrigate Correctly – Be sure to irrigate regularly and whenever the soil is dry at the base of the root ball. Lack of proper irrigation is the most common problem for newly planted trees.
If you’ve selected the right high quality tree for the right location and you follow proper planting technique, your new tree will have an opportunity to thrive and add to the beauty and value of your property.
